Saturday, January 21, 2017

Harry Potter inspired Wand Holder DIY Tutorial

Any aspiring witch or wizard will eventually acquire a wand. My daughter currently has two wands. A gorgeous wooden wand made by her friend as a birthday gift and an interactive wand that we purchased at Ollivander's in the Wizarding World of Harry Potter.

Both wands are beautiful. She plays with them several times a week so I find them lying around the house. I don't want either to be damaged or accidentally stepped on. I looked on line for wand holders and they cost $30-$50. That seems like a lot of money to keep a stick off the floor.

Looking at the wall mounted holders I decided that I could make one myself for about $5.00. No, it will not bear the official Wizarding World of Harry Potter logo. No, the craftsmanship will not be the same as that of an accomplished woodworker. But it will serve the purpose of displaying the wands and keeping them out of harm's way.

I purchased an inexpensive wooden plaque from Michael's. I paid $2.10 for it, using a 40% off coupon. The rest of the materials were items that I had on hand. You may need to purchase some of these.

How to Create a Simple Wand Holder

Materials:
  • Unfinished wooden plaque
  • Acrylic paint (any color you like)
  • Sandpaper
  • Stain pen or antique gold acrylic paint
  • Paint brushes
  • Paper towels
  • Cup hooks
  • Pliers
  • Nailess hangers
  • Stickers or Decorations (optional)
  • ModPodge (optional)

Process:

Sand the unfinished wooden plaque until it is smooth. Press or gently hammer in two push in sawtooth hangers. Make sure that they are level with each other. I simply placed these where I wanted them and pushed them in with my hand - no tools necessary if you are using a soft wood (pine) plaque.


Paint the plaque with acrylics in the color of your choice. I used black.

When the paint is dry screw in cup hooks. Space the hooks three inches apart vertically and  at least four inches apart horizontally.

I used four large black hooks -  enough to hold two wands.  Cup hooks have screw ends so you just have to twist them into the wood. Once again, no tools necessary.


My initial plan had been to hang the plaque vertically, but the wands need at least four inches of space between the hangers in order to stay in place. You can see the holes where I had originally placed the hooks. If you make a mistake like I did you can fill in the holes with spackle before painting, or cover them with a decorative accent later.


Next, use a pair of pliers to bend each cup hook into a U shape so that it will hold the wand better.


Sand the edges to the bare wood. When you are done rub the piece with a paper towel or cloth to remove any fine dust. I think the distressed edges give it an aged effect.


Rub stain or gold paint carefully along the sanded edges to give the piece depth. You can also use a stain or paint pen to fill in these areas. If you use stain, be sure to rub it with a clean cloth before it dries so that it will set properly. If you don't have paint or stain you can fill in these areas with a gold colored pencil or leave them bare.


If you want to add embellishments you can add a lightning bolt, a Hogwarts crest or a House crest. I had a Hogwarts sticker so I attached it to the center of the wand holder. If you add stickers or any other decorative items be sure to seal them onto your plaque using ModPodge.


Finally, hang it up and set your wands in the brackets.

WANT TO BUY THE BOOK?  You can also follow me on Facebook!

Harry Potter Themed Bathroom Inspiration

When I decided to recreate a Harry Potter themed bathroom for my youngest daughter I knew several things:

 1) I didn't want it to include characters. The idea of life-sized people standing around the bathroom with me seemed, well, creepy. So FatHead wall stickers were mostly out. I did consider buying stickers that loked like castle windows.

2) I didn't want it to cost much. I decided that $200 would be my maximum which would include replacing towels, a mirror and her shower curtain.

3) I wanted it to be tasteful, not tacky. I wanted there to be nods to items in the books, not necessarily replicas of those items.

Having searched the internet I decided that there were a number of easily incorporated Harry Potter icons:

  • keys (reminiscent of the flying keys from Harry Potter and The Sorcerer's Stone)
  • owls
  • any familiar animals that you like - cats, toads, owls, rats...
  • old bottles (potions)
  • candles (all battery operated to eliminate fire hazards)
  • fake stained glass like the Prefect's bathroom in Harry Potter and the Goblet of Fire(which also provided a bit of privacy)
  • ornate gilt or gold toned mirror as a nod to the MIrror of Erised
  • fake stone for the walls
  • anything parchment toned
  • Mythological creatures that were mentioned including dragons, unicorns, gryphons and centaurs
  • Braver kids than mine might enjoy tiny spiders heading toward the window or a snake painted and glued to the sink

Architecture is very important in Harry Potter sets. Ideally the bathroom would have an arched doorway and arched mirror with columns to either side. You can buy beautiful spiral columns and install them if you have the budget for them or you can use foam accent pieces. 

There are also wall decals that will simulate the columns. Given the size of our bathroom and my budget I had to give up the architectural elements.

We only have ceiling lights in our bath. All of the candles shown in the movies are tapers, typically in brass fixtures. You can find reasonably priced brass hanging wall candle holders if you want to use real candles.

I wanted to add battery powered faux candle sconces but couldn't find the right space.

A chandelier and arched, mullioned windows are great additions if you have them. If you're modeling your bath after the Prefect's bathroom you can order a small chandelier and a window wall decal to mimic the effect.

There are loads of Harry Potter themed items that you can buy. I bought some of these, but my goal was to keep it looking more like a bathroom that would be inside Hogwarts than the bathroom of a Harry Potter fan. Therefore I limited blatant Harry Potter merchandise to house colors, crests and banners, travel posters and toys we owned.


You can see from my sketch that I planned to hang her broom, robes and wands in the bathroom just as if it was a real student bathroom.

We have a small, narrow window in this bathroom, otherwise I would have used pennants or banners for window treatments. As it is, I felt the stained glass window cling was sufficient. I even found a faux stained glass mermaid cling on Etsy. I decided to hang a Hufflepuff banner near the toilet. Of course, I didn't measure the space when I was planning and the banner was too wide for this area. I swapped it for a retro Hogwarts Express travel poster. I hung the Hufflepuff banner on the wall opposite the shower.

I looked at a number of fake castle window clings. I liked the pink ones best - except for the fact that they were PINK. If these had come in a realistic stone look I would have blown my budget and purchased them. If I decide to buy a fake window decal in the future, it will probably be one that has granite looking edges and features unicorns. After all, there were unicorns in the Forbidden Forest.


WANT TO BUY THE BOOK?  You can also follow me on Facebook!


Harry Potter Inspired "Mirror of Erised" Party Decoration


I wanted to incorporate as many elements from the books as I could in the great Harry Potter bathroom redecoration Project. Naturally a bathroom needs a mirror and what could be better than the Mirror of Erised?

I found one on line, but it is small (only 16-1/2" by 8-1/2"). It costs $75 plus shipping so I looked for ways to make my own version. If it didn't work out I'd rather spend the $75 on a larger, more useable bathroom mirror.


I  discovered this great post on Delicious Reads about creating a Mirror of Erised. I knew I had to create something similar for our tiny bath. I would have loved to buy a six foot high mirror and make a frame for it space was at a premium.

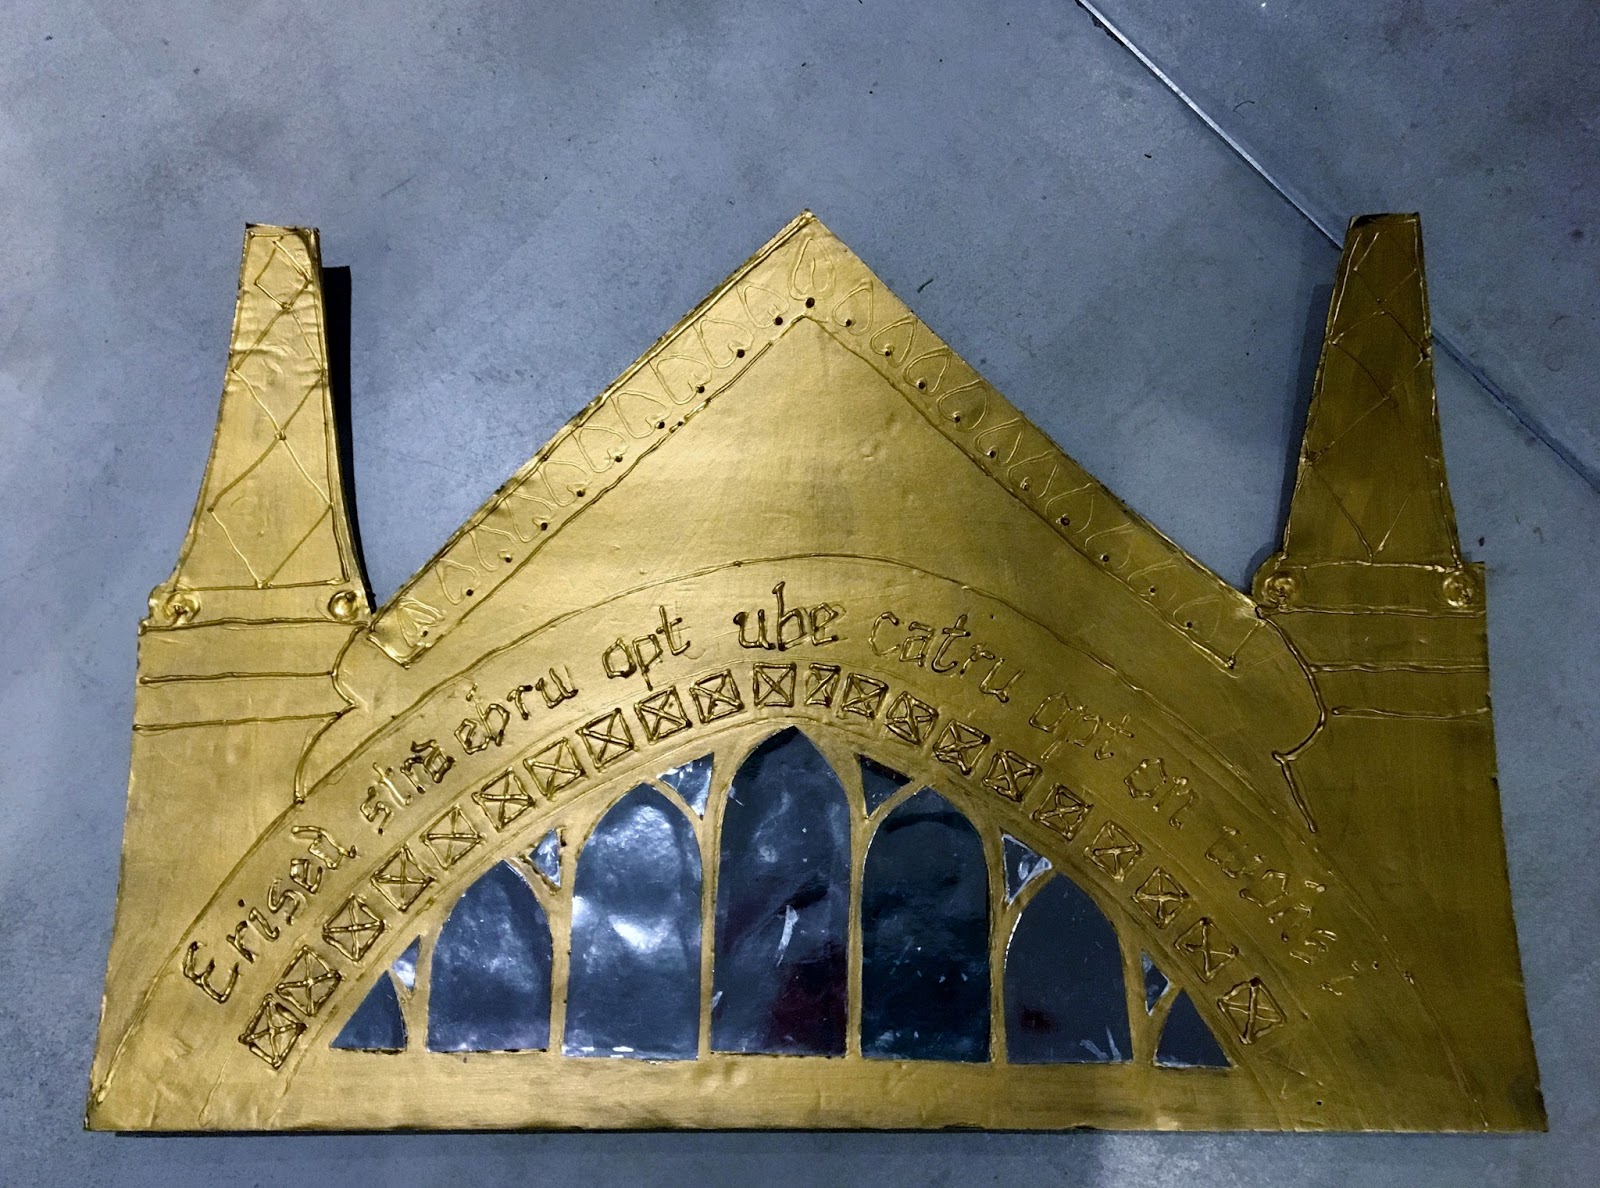
I tried to make something similar following their instructions. I used a piece of black foam core from Dollar Tree to reinterpret their design as a lintel (header) for my daughter's existing mirror.  I realized going into this that it might turn into a party decoration rather than a permanent part of the bathroom décor.

Materials:

(Please note that while these are Amazon Affiliate links the State of Rhode Island will not allow me to profit from traffic to the site.)

I was able to get materials locally for less than $7. I had the Exacto knife on hand.

Process:

I downloaded the templates from the Delicious Reads blog and sized them to fit  my daughter's existing wall mirror. Then I used the grade school rubbing technique to transfer the design on to the piece of foam core. I used chalk so it would show up against the black foam core.


The templates were only for the arched section of the mirror top so I had to freehand the remainder of the design.


Originally I tried to use plain white school glue to add dimension to the details. It takes longer to dry, but doesn't harden as quickly as hot glue so it was easy to work with. However, it was flat once it dried.  I realized that I needed a better solution.


I used metallic gold folk art paint to cover the entire design. It took several coats to hide the black. Maybe white foam core would have been a better choice. Live and learn.


When the gold paint was dry I retraced my glue design with gold dimensional glue. In retrospect, the white glue lines, while flatter, looked better. You need a very controlled grip to get the dimensional glue to flow evenly.


I bought a piece of silver scrap book paper to fill in the "mirror" openings in the design. I glued sections inside of each "opening." Then I traced the edges with the white glue. I also lettered the incantation freehand, which was harder than I had expected. And I didn't pay attention to the actual incantation so my version makes no sense when you read it backward.


I used an Exacto knife to cut around the edges of the design.


From start to finish, the project took about an hour. Quick & cheap, but it looks it. I rate this a Pinterest FAIL.


Synopsis:

Based on how this turned out, I decided to tuck it away in case there is a Harry Potter themed party in our future. At least I had fun making it.

Instead, I bought an ornate mirror that was similar in size to DD's existing bathroom mirror. I used antique gold spray paint to make it look more like something from Hogwarts.

Then I discovered that her existing mirror had been glued to the wall and wasn't coming off without the use of a sledgehammer.

So she has her original rather simple, Scandinavian mirror, unembellished. Sometimes you just have to cut your losses. Now if only I could figure out where to put the mirror that I painted gold...


WANT TO BUY THE BOOK?  You can also follow me on Facebook or Pinterest


Tuesday, January 17, 2017

Harry Potter Inspired Bathroom Decor

My youngest daughter is ten and elbow deep in Harry Potter and the Order of the Phoenix. I'm stunned that the girl who doesn't like to read has poured over more than 2,000 pages since last summer. I've decided to reward and encourage this with a surprise room make over.

She received a wand and a robe for her birthday and a broom for Christmas so we have a fair amount of Harry Potter paraphernalia. Add in a few stray items like a Butterbeer mug, a chocolate frogs box, a Funko Hagrid figure, and a golden snitch and we've got the beginnings of a good room.

I know that she doesn't want her entire bedroom Harry Potter-themed. She has other interests and her room reflects them. However, the tiny bath off her bedroom is plain and has remained unchanged since we moved into this house two years ago. It seems like the perfect place for a little wizardry.

My first step, like everyone's, was to check Pinterest for Harry Potter bathroom ideas. I was surprised when I searched that nothing showed up. I mean, the Harry Potter series unlike most books, actually mentions bathrooms. They feature prominently in both The Chamber of Secrets and The Goblet of Fire. I discovered several amazing bedroom make overs and a few family rooms, but not a single bathroom.

A girl needs a place to hang her broom and wash her hands, so the secret bathroom redecorating began.

This project faces a few challenges. I have to contend with a very small space, with some odd angles and a lot, and I mean a lot,  of tiny turquoise tiles. Nothing in the Wizarding World is turquoise. Red, yellow, green and navy, but not a hint of turquoise.

Littlest has declared herself a Hufflepuff. Actually, a friend decided it for her and she embraced it. Anything better than Slytherin, in her opinion, I guess. So now I have yellow and turquoise to work with - this is going to be one bright bathroom!

These are my awkward "before" photos. My goal is to plan everything out, order what I need and sneak in one day while she is at school and attack. That means no ambitious retiling or remodeling. Plus, I wanted to keep it inexpensive. Yes, she loves Harry Potter now, but it is quite possible that at 15 she won't.


Here are the items that I ordered from Amazon.com. (Please note: while these are Affiliate links the State of Rhode Island will not allow me to collect payment from any traffic generated through them.)

Skeleton Key hanger (2) $6.15 each - to hang broom and robe
Hogwarts Map Shower curtain $14.99 (shipped from China, so slow to arrive)
Tiny bird cage $6.00 for tiny owl we already owned
Hufflepuff banner $12.49 (these are available for each House in case you're not a Hufflepuff)
Stained glass window cling $7.98 (to mimic Prefect's bathroom)
Hogsmeade Retro Travel poster $7.00
Hogwart's Express Retro Travel poster $7.00
Owl jewelry hooks $14.49
Ministry of Magic toilet sticker $7.99
Candle nightlight $8.29
Turquoise towels

These items totaled $98.53, not including the new towels. You could save almost $15 if you don't order the owl jewelry hooks.

I also ordered two Hufflepuff crest emblems to iron/sew on to the new towels. I ordered these from an Etsy vendor. They cost $15.35 including shipping. Several Etsy sites sell these, I chose the ones I liked the best. You can order custom embroidered towels if you don't want to attach the crests yourself.

We already had a set of Lumos Nox stickers ($9.99) for the light switch that were a gift.

In addition to the items I ordered I will make a Mirror of Erised frame for her existing mirror, a wand holder and do a little faux finishing on the walls.

If I had more space I would have added pictures or figurines of unicorns, gryphons, dragons or centaurs.

Hopefully it will be a magical transformation worthy of a wizard in training.


WANT TO BUY THE BOOK? You can also follow me on Facebook!