
I found one on line, but it is small (only 16-1/2" by 8-1/2"). It costs $75 plus shipping so I looked for ways to make my own version. If it didn't work out I'd rather spend the $75 on a larger, more useable bathroom mirror.
I discovered this great post on Delicious Reads about creating a Mirror of Erised. I knew I had to create something similar for our tiny bath. I would have loved to buy a six foot high mirror and make a frame for it space was at a premium.
I tried to make something similar following their instructions. I used a piece of black foam core from Dollar Tree to reinterpret their design as a lintel (header) for my daughter's existing mirror. I realized going into this that it might turn into a party decoration rather than a permanent part of the bathroom décor.
Materials:
(Please note that while these are Amazon Affiliate links the State of Rhode Island will not allow me to profit from traffic to the site.)
- 1 sheet of foam core
- Exacto knife
- Dimensional gold glue
- Gold acrylic paint
- Silver scrapbook paper
Process:
I downloaded the templates from the Delicious Reads blog and sized them to fit my daughter's existing wall mirror. Then I used the grade school rubbing technique to transfer the design on to the piece of foam core. I used chalk so it would show up against the black foam core.


The templates were only for the arched section of the mirror top so I had to freehand the remainder of the design.

Originally I tried to use plain white school glue to add dimension to the details. It takes longer to dry, but doesn't harden as quickly as hot glue so it was easy to work with. However, it was flat once it dried. I realized that I needed a better solution.

I used metallic gold folk art paint to cover the entire design. It took several coats to hide the black. Maybe white foam core would have been a better choice. Live and learn.

When the gold paint was dry I retraced my glue design with gold dimensional glue. In retrospect, the white glue lines, while flatter, looked better. You need a very controlled grip to get the dimensional glue to flow evenly.
I bought a piece of silver scrap book paper to fill in the "mirror" openings in the design. I glued sections inside of each "opening." Then I traced the edges with the white glue. I also lettered the incantation freehand, which was harder than I had expected. And I didn't pay attention to the actual incantation so my version makes no sense when you read it backward.
I used an Exacto knife to cut around the edges of the design.
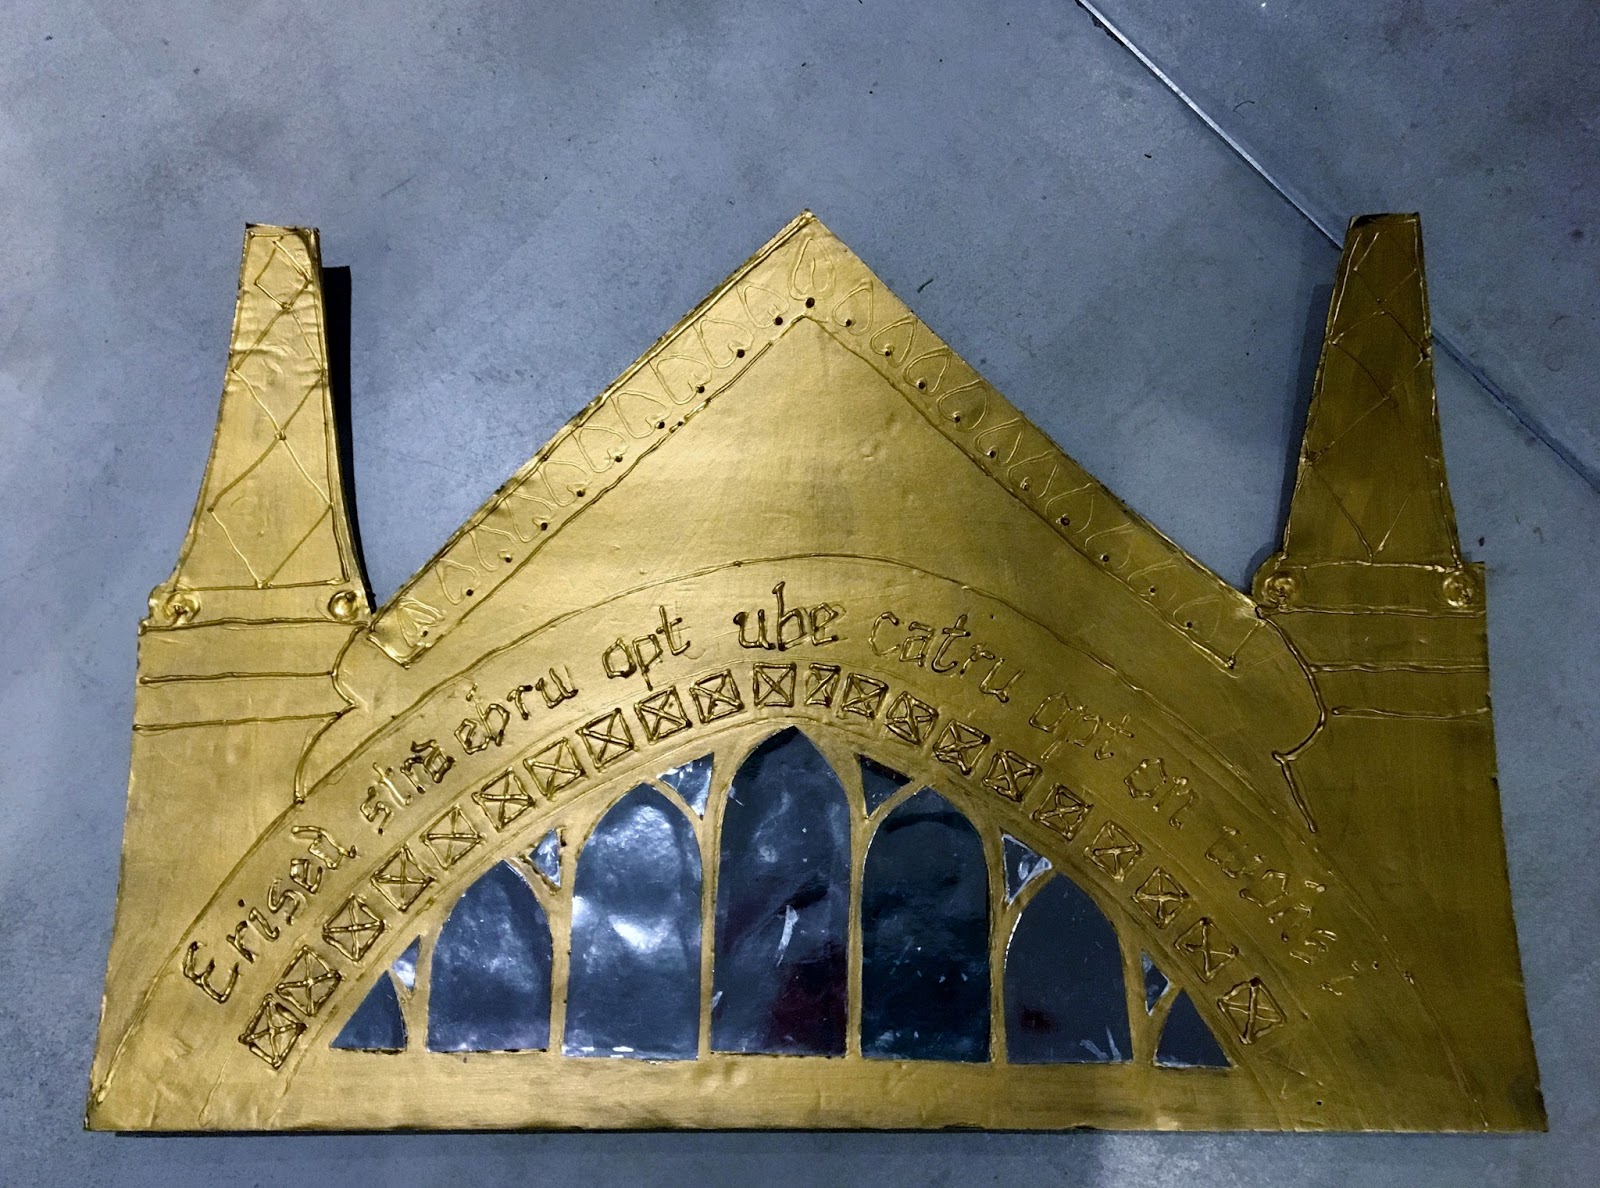
From start to finish, the project took about an hour. Quick & cheap, but it looks it. I rate this a Pinterest FAIL.
Synopsis:
Based on how this turned out, I decided to tuck it away in case there is a Harry Potter themed party in our future. At least I had fun making it.
Instead, I bought an ornate mirror that was similar in size to DD's existing bathroom mirror. I used antique gold spray paint to make it look more like something from Hogwarts.
Then I discovered that her existing mirror had been glued to the wall and wasn't coming off without the use of a sledgehammer.
So she has her original rather simple, Scandinavian mirror, unembellished. Sometimes you just have to cut your losses. Now if only I could figure out where to put the mirror that I painted gold...
WANT TO BUY THE BOOK? You can also follow me on Facebook or Pinterest
No comments :
Post a Comment